East Coast Part Supplier and Warehouse Association Moderated Interchange Newsgroup > Connecticut
> Production
> Food Processing
> Epoxy resin crystal clear table top imbedding 2 gallon
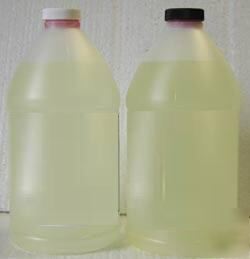
Epoxy resin crystal clear table top imbedding 2 gallon
Available in 2 Part Kits Mixing Ratio By Volume: 1:1
THIS PRODUCT RESISTS "yellowing" MORE THAN MOST ANY OTHER EPOXIES ON THE MARKET.
1 GALLON HARDNER 1 GALLON RESIN
32 Sq. Ft. FLOOD COAT @ 1/8" THICK
This product is a 100% solid, two component, clear polymer coating that is mixed at a 1 to 1 ratio by volume. Each kit contains a bottle of resin and a bottle of hardener. The product cures to a clear, high build, glass like finish that resists scratching, yellowing and will not distort with age. Items coated with it will become permanently preserved and protected for your enjoyment throughout a lifetime. This product will not exhibit blushing or sweat out under high humidity conditions.
This product is commonly seen on bar tops and table tops in many bars and restaurants.
The product should be applied in two stages. The first stage is referred to as the seal coat. The seal coat is brushed on in a thin layer and is used to seal any pores in the surface and prevent air bubbles from forming in the following flood coats. This stage is followed by the flood coat, which will flow and self level, clean brushes or squeegee can be used to help spread the epoxy. Flood coats are applied in 1/8" layers at a time, as many as desired can be applied, however one to three coats is average for most table or bar coatings.
Recoating can usually be be done within 4 to 8 hours. If re-coated within this time period no sanding is necessary between layers.
If your previous layer has fully dried, light sanding with 220 or 320 grit sandpaper is recommended to achieve a good bonding surface. After sanding you should wipe down with a solvent such as denatured alcohol, acetone or lacquer thinner to remove any impurities from the surface. (do NOT use mineral spirits)
Objects, such as pictures, maps etc. can be imbedded in this product during the pours. Most photo quality paper does not require any special preparation however sometimes thin paper objects must first be sealed with a white glue or similar product to prevent the CLEAR COAT from fully penetrating the paper and causing it to become transparent.
* Imbedding Solid Objects (wood, rocks, shells, etc.)
All porous materials should first have a seal coat of epoxy applied. This will prevent air bubbles from occurring in subsequent flood coats. Usually the objects can be set in place before sealing.
For best results the product should be used at temperatures from 70-80 degrees F. The room which you are working should be clean, dry, dust and insect free. Settling dust can often cause blemishes on the glassy surface.
Please not that although this product will resist yellowing better than other epoxies it is NOT 100% UV resistant. Continuous outdoor UV exposure over months or years will cause the finish to lose its gloss and cause gradual changes in color.
Coverage: Calculate the amount you will need for your area Length x width. Remember not to combine seal and flood coat coverage's. Flood coats are designed to go on approximately 1/8" thick, which is about three times thicker than that of a seal coat.
Example: A 6ft x 4ft bare wood table (24sq ft) would require 2 Quarts to complete ONE seal coat and about a gallon and a half to complete ONE flood coat for a total of Two Gallons.
This material leaves professional results when applied correctly so take your time and make sure to beware of these of the common problems we have seen encountered by first time users.
1. Always make sure that your mixing container is clean and your measuring device is accurate, this product REQUIRES that you mix at a 1 to 1 ratio by weight or volume, any variances from this can cause the epoxy to stay soft and not fully cure.
2. This product requires a THOROUGH mixing, usually between 3-4 minutes of solid mixing without excessive whipping of the mixture(whipping will put lots of air bubbles into the epoxy). Amounts greater than one gallon at a time can require upto 6-7 minutes of mixing.
3. After the two components are poured together and stirring begins the mixture will turn a cloudy white color, this represents areas in which the epoxy has not fully combined. You must continue to mix until all signs of cloudiness and tiny white lines have completely disappeared (usually takes 3-4 minutes of thorough mixing).
4. Always scrape the sides of your mixing container and also the stick during those 3-4 minutes. If UNMIXED epoxy remains on the side of the container or the stick it will cause wet spots on your finished product if that UNMIXED material falls into your project......Followup: While pouring your epoxy onto the surface NEVER scrape the container to remove every last drop, because no matter how thorough you mix there will always be an unmixed drop on the side of the container that will leave a wet spot.
Recommendation of Materials Needed For Application
Safety Gloves- Epoxy can be very sticky
CLEAN Stir Sticks - Any dirt will end up showing on your product. Mixing is very important, if you whip while mixing you will end up with air bubbles, long thorough stirs are required.
Applicators - Rubber squeegee are simple to use and leave no air bubbles. Foam brushes and nylon bristle brushes are preferred with epoxy, make sure there are no loose hairs.
Hair Drier, Heat Gun or Torch - These are used after the pour is completed and the epoxy is still liquid. A very smooth stroke across about 6-12 inches above the epoxy surface will burst remaining air bubbles.
Below is a bar that I built for some friends. I used the epoxy on the top of the bar and on the top of the underlaying countertop. It was the first time I had used this type of product, and it was wonderfully easy and absolutely beautiful!!
Our CLEAR COAT product can be used in any of the above mentioned applications
to achieve a super hard clear finish with great depth.